SpDrS60 Panel
Contents | FAQ | Manual | General Tips and Tricks | Change Log | Multiplayer Manual | Line Operations Manual | Voice Communications | Change Log | Developers pages
The panel

The panel consists of small tiles which schematically represent the area of responsibility. Behind these small tiles are signal lights that change to indicate various states. Tracks, signals, switches are all represented by different colours of light bulbs being on or off.
These lights are not infallible and do burn out, so remember that the panel can be wrong.
Buttons
Various types of buttons are used:
- black (1) : Used for manually throwing switches, for instance. The black buttons are seldom used. You will find these for example for switches.
- grey (2) : Used for setting shunt routes.
- grey with a red dot (3) : used for setting train routes.
- grey with yellow dot : used for specific operation related to Level Crossings.
- brown with white dot : these buttons are available on some dispatching panels instead of black buttons, in case the respective switch or track is equipped with axle counters.
Buttons may only be pressed, and cannot be pulled or turned as is the case with other dispatching panels.
Signals
There are a variety of signals on the panel. Almost always, signals are located on a track.
Train Number Indicators
One of the first uses of train number indicators in Germany was in Braunschweig. The indicators are tremendously useful for showing where trains are located.
There are limitations, however. Not every main signal has an train number indicator. The numbers jump to the next indicator when a signal drops to “stop”.
This means:
- If you revoke a route without putting the signal to “stop” the number gets transported to the next box as an error number of the form Fxxxxx where xxxxx is an incremented number. Use the HaGT button to first put the signal to stop before revoking.
- Setting a shunt route from a track with an indicator to a signal without an indicator, the number does not get transported. The system does not know what to do with the number!
- If you set a train route to a subsidiary signal, the train number is not transported. The system cannot see where the train will go behind the signal.
There are limitations here particularly during shunting. During shunt movements frequently use tracks that do not have train number indicators. Thus, the number can "jump" nowhere and will stay where it was. The number must then be deleted manually. Conversely, if a new train is assembled, the train number must be entered manually into the Train Number Indicator for the specififed track. The ZNP801 is used to delete or enter train numbers.
-
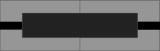 Train Number Indicator, track unoccupied
 -
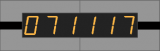 Train Number Indicator, track occupied


Panel Magnets
Sometimes it is necessary to place reminders directly on the panel to indicate various things worth remembering. A good example is indicating where engineering work is occurring or where wrong line working is active.
The solution is panel magnets (4). These are magnetic labels that can be placed anywhere on the panel.

To place a magnet, first open your “magnet bin” by pressing the "magnet bin" icon at the top left of the main panel window.

If it is not visible, navigate to Panel > Magnets to toggle the visibility of the bin.
Mouse over the magnets in the magnet bin to get a description of when to use each one.
Choose a magnet by clicking on it. Your cursor will change to look like the magnet. Click anywhere on the panel to place the magnet. If you placed it incorrectly, or wish to move it, simply click and drag the magnet.
To remove a magnet completely, zoom out, and drag the magnet off the panel into the flat grey space beyond the tile grid.
When you are done placing magnets, you may press the button to hide the magnet bit once more (see icon below).

If you want to hide the arrows completely, use the Panel > Magnets menu option.
Magnet types
 There is one special magnet that initially looks completely black. When you place it, however, you’ll be prompted to enter a short amount of text. This can be any text, as long as it is fairly short – there’s not a lot of room to write on the magnets. If you ever want to change the text or the color of this type of magnet, right‐click on it to get the text window again.

 OHLE earthed/switched off
 Track in possession (Gesperrtes Gleis)
 Wrong Line Working Active (Befahren des linken (falschen) Gleises)
 Section Clear Confirmation Required (Räumungsprüfung)
 Unexpected Track Occupation (Abschnittsprüfung)
 Maintenance Vehicle (Kleinwagenfahrt)
 Out-Of-Gauge Train (Lademassüberschreitender Zug)
 Do not run against sense of traffic (Nicht Links Fahren)
 Engineering Works (Arbeiten)
 Railway Crossing Defect (Bahnübergang)


Collars
In some cases, it is necessary to prevent buttons from being pressed entirely. A good example of this occurs when there is engineering work being done on a track. In addition to magnets being placed, it’s also a good idea to place collars over the buttons. These look like plastic caps and come in two colours:
- red
- glass
The red ones are used when we want to be very explicit about not pressing a particular button. To place a red collar, press F5. The cursor will change to a red circle. Then, press the panel button or the group button to which you want to apply the collar. To remove the collar, press F6, followed by the collar you wish to remove.
Placing and removing glass coloured collars is done the exact same way, using F7 and F8 respectively.
A button with a collar cannot be pressed, even accidentally. If you need to press the button, you must first remove the collar, press the button, and then replace the collar. These extra steps prevent you to make mistakes and are good as a reminder!